

September 28, 2018
Refrigerator Repair
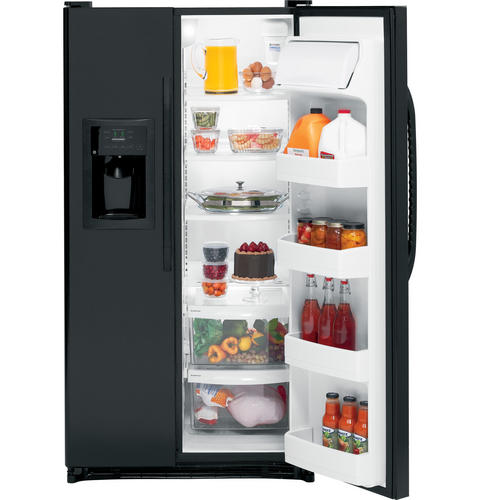
The hum your GE refrigerator model GSS25GFXBB makes as it runs is a familiar noise that usually goes unnoticed. However, when that sound becomes constant, it indicates your appliance is struggling to maintain its set temperature. If you ignore your refrigerator’s prolonged running or continue to put off fixing it until a later date, you’re not only shortening the life of your appliance, but your refrigerator is also burning through energy, which means your monthly utility bill will increase. There are two possible reasons behind a refrigerator that won’t stop running. The first is a lack of maintenance, and the second is a malfunctioning component. The repair guide provided below will help you fix your constantly running refrigerator.
Never start repairing your appliance before unplugging it from the wall or turning it off at the circuit breaker. Safety gear, such as work gloves and goggles should be worn to protect your hands and eyes from injury.
Maintenance Tips
-
Check the air vents in your freezer compartment. Although it is recommended to keep your freezer filled, too much food stored in the compartment can end-up blocking the air vents that supply cold air to the fresh food compartment. Obstructed vents mean your refrigerator will need to work harder and longer to reach its set temperature. If the vents are blocked, either move the food in your freezer around or take-out food that is no longer good. Once you’ve done that, spend a day paying close attention to how long and how often your refrigerator runs.
-
The condenser coils in a refrigerator work to cool down the appliance. While cleaning the coils in older GE refrigerator models is a necessity, newer GE refrigerators are equipped with a Neverclean condenser. According to the GE website, Neverclean condensers are found inside the compressor housing, meaning they are protected from dirt and dust. Although this means you don’t need to clean the actual condenser coils in your refrigerator, GE still recommends you clean behind and underneath your appliance with either a vacuum or broom to ensure your refrigerator runs at its most efficient level.
Refrigerator Repair Help
The Door Gasket
The door gasket creates an airtight seal around the refrigerator’s fresh food compartment and freezer door. If the gasket is dirty or it is torn, the seal becomes ineffective, which leads to cold air escaping your appliance and hot air entering it. The air coming in and out of your refrigerator can cause your appliance to struggle as it tries to maintain the proper temperature, meaning it will run for prolonged periods of time. Before replacing the gasket, clean it. As you are wiping the part down, keep an eye out for tears in the rubber. If you spot any, you’ll need to swap out the faulty gasket for a new one.
How to Replace the Door Gasket in Your GE Refrigerator
-
Before taking the old gasket off your refrigerator, remove the new gasket from its packaging, and place it in a bathtub filled with hot water. This will help stretch out the gasket after it’s been folded up in its packaging for an extended period of time.
-
Open your refrigerator door, and pry off the old gasket with a flat head screwdriver. Once one side is loose, simply use your hand to pull the other sides off the door. After the gasket is free of the door, clean the area underneath it.
-
Remove the new gasket from the bathtub and allow it to air dry. Once it is ready, start installing the gasket on the top corners of the door. You will need to push firmly on the part to ensure its connection to the door is secure. After the top is in place move down to the bottom of the door and attach the gasket. With the top and bottom connected, push the right and left sides in.
-
Now that the gasket is installed, rub it down with petroleum jelly and shut the door. Leave the door closed for at least two to three hours to create an airtight seal. After a few days have passed, wipe down the gasket to remove any remnants of the petroleum jelly.
-
For the next couple of days pay close attention to how often and for how long your refrigerator runs. If both situations decrease, replacing the gasket solved the issue.
The Condenser Fan Motor
The condenser fan motor blows cold air over the condenser coils. If the motor is defective, the fan will not function and the compressor will have to work overtime to cool your refrigerator. Replacing the condenser fan motor is the only way to stop your refrigerator from running constantly.
How to Replace the condenser Fan Motor in Your GE Refrigerator
-
Slide your refrigerator away from the wall, and move to the back of your appliance. Unthread the screws holding the lower, rear access panel in place. Lift the panel up and off the refrigerator.
-
Detach the condenser fan motor wires and release the wires from their retaining clip with a pair of needle-nosed pliers. Unthread the single screw holding the fan motor mounting bracket onto the fan motor. Pull the mounting bracket off and out of your appliance.
-
You’ll need to disconnect the fan blade from the motor shaft by inserting your hand in-between the two and pushing on the fan. Once the fan is detached, pull the fan motor out of the appliance.
-
Before installing your new condenser fan motor, you’ll need to take the grommets off the old part. The grommets are small plastic components that provide a buffer between the fan motor and the motor bracket. If you discover the grommets are damaged in any way, you’ll have to order new ones before reinstalling your condenser fan.
-
Once you’ve transferred the grommets to the new fan motor, you can insert the motor shaft through the back mounting bracket and push the fan blade onto the shaft. Align the front mounting bracket with the fan motor, and secure it with a screw. Spin the condenser fan with your fingers to ensure it rotates freely, and reconnect the fan motor wires.
-
Replace the lower access panel and secure it with the screws you took out at the beginning of your repair.
-
Plug your refrigerator back in or turn it on at the circuit breaker. Throughout the day, keep an eye on your appliance to see whether or not the new motor is functioning properly.
Other Malfunctions That May Cause Your Refrigerator to Run Constantly
The Evaporator Fan Motor pushes air over the evaporator coils and circulates air through the freezer and fresh food compartment. If the motor is defective the temperatures in your appliance will rise, causing your refrigerator to run continuously as it tries to cool the freezer and fresh food compartment down.
The Defrost Heater is activated multiple times a day to melt the ice and frost off the evaporator coils. A failing heater may not turn on, which will cause the evaporator coils to ice up and the air flow in your appliance to decrease. Restricted air flow means your refrigerator has to run more often and for extended periods of time to reach the set temperature. Switching out the faulty defrost heater for a new one is the only way to solve this problem.
If your refrigerator continues to run and you aren’t able to pinpoint the cause behind it, please contact us today to schedule an appointment with one of our highly experienced appliance repair technicians.

Apr. 09, 2024
How to Reset a Whirlpool Refrigerator Ice Maker

Apr. 09, 2024
6 Reasons Your LG Refrigerator Is Not Making Ice

Apr. 09, 2024
Kenmore Fridge Ice Maker Not Working? 5 Ways to Fix It

Mar. 06, 2024
How to Remove Fish Smell from Your Refrigerator

Mar. 06, 2024
How To Fix Bosch Dishwasher E24 Error

Mar. 06, 2024
Troubleshooting a Whirlpool Dishwasher Not Draining

Feb. 05, 2024
Why Is Your Fridge Water Not Working, but Ice Is?

Feb. 05, 2024
How to Fix the E15 Bosch Dishwasher Error Code

Feb. 05, 2024
How Much Power Does a Microwave Use?

Jan. 03, 2024
How to Properly Clean Refrigerator Coils

Jan. 03, 2024
How to Fix an LG Washer Showing OE Error Code

Jan. 03, 2024
Troubleshooting a GE Dishwasher with No Power and No Lights

Dec. 11, 2023
10 Reasons Why Your Bosch Dishwasher Won’t Start

Dec. 11, 2023
Troubleshooting the F5 Error Code with a Maytag Washer

Dec. 11, 2023
How To Fix a Kenmore Dryer That Isn’t Heating
(937) 252-3200Text or ring! ring!