

June 7, 2021
Washer Repair
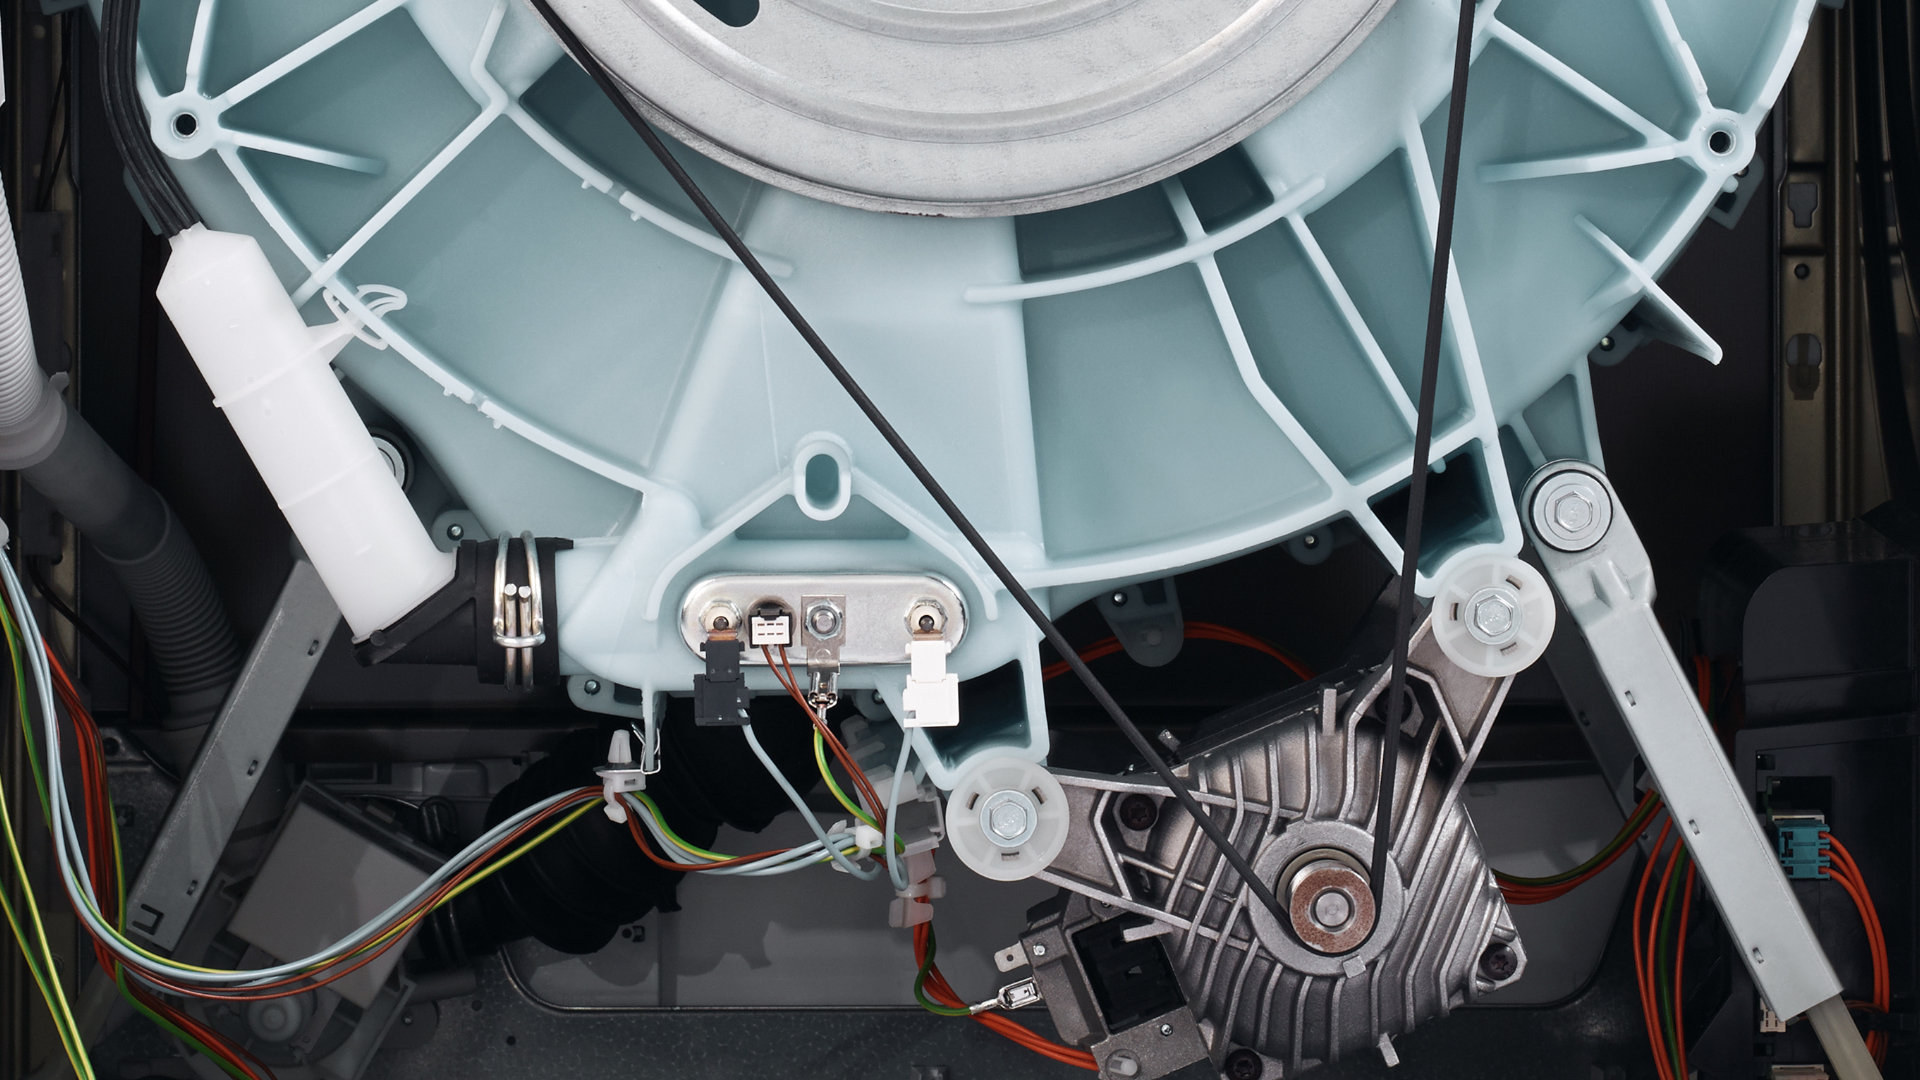
If your washing machine is not spinning, the most likely reason is that you need to replace the belt that turns the tub in the washing machine. Similarly, if you are finding that the spin speed is slow, the tub is spinning erratically, and/or clothes are very wet after a cycle, the belt also likely needs to be replaced. With the right tools and this guide to follow, you should be able to replace the belt yourself, without the need for a trained professional.
Preparation and Tools
- Make sure to purchase the correct washing machine belt that matches your washing machine make and model number. Washing machine belts come in different sizes, and the wrong type of belt is likely to cause a range of issues that will damage the washing machine.
- Washing machines typically feature sharp edges. Therefore, it is recommended that you wear protective gloves when replacing the washing machine belt.
- If you have a top-loader washing machine, you will require a putty knife to remove the front panel; if you have a front-loader, you will require a screwdriver to remove the rear panel.
- To assist with fitting the new belt to the washing machine, you will need a cable tie, and it is also recommended that you purchase a washing machine belt install tool. The tool goes around the motor shaft and should make fitting the belt a lot easier. You will also need some wire cutters to remove the cable tie when the installation is complete.
- If you have trouble changing the belt, laying the washing machine on its back may give you better access.
How to Replace the Belt
- To avoid electric shock, disconnect the power to the washing machine.
- Access the washing machine belt, motor, and tub-drive pulley.
If you have a top-loader washing machine, you will need to remove its front panel. To remove the panel, use a putty knife to slip between the top and front panel to press against and release the two spring clips that secure the front panel. Pull the front panel forward, and lift it up to remove it from the washing machine.
If you have a front-loader washing machine, you will need to remove its rear panel. To remove the rear panel, remove the screws that secure it to the washing machine. If the washing machine has rear cabinet plugs, remove them by lifting and sliding them out before removing the panel.
If the washing machine has a smaller, lower-rear panel that will restrict your access to the tub-drive pulley, you will need to remove the top panel on the washing machine as well. Use a screwdriver to remove the screws to the lower rear access panel and the top panel; then lift the panels off. Then, wedge an object, like a piece of wood, between the rear panel and washing machine to get better access to the belt. It will be a little more difficult to change the washing machine belt with this model of washing machine; however, the same method as the other models to replace the belt still applies.
- Rotate the tub-drive pulley to help unthread and remove the old washing machine belt.
- Fit the belt install tool to the motor shaft. If you have decided not to use this tool, move on to the next step.
The belt install tool comes in two halves, which need to be aligned together, with the O-ring being placed on top and secured in the groove. Slide the tool onto the motor shaft by stretching it until it locks into place in the first groove, or apply one half to the motor shaft, then the second half, and then the O-ring. The belt install tool should now be secured to the motor shaft.
- Take out the new belt, and position it with the groove side facing toward the pulley. The new belt won’t have been stretched like the old belt, which is why cable ties are needed to help install the belt.
- Hold a part of the belt up to the edge of the large tub-drive pulley – groove side facing in – and wrap the cable tie around the belt and tub-drive pulley. Secure the cable tie so that it holds the belt firmly against the tub-drive pulley.
- Take one end of the belt, and place it around the motor pulley above the belt install tool. If you do not have the belt install tool, still put one end around the motor shaft.
- Turn the tub-drive pulley so that the belt feeds onto the pulley. Without the belt install tool, the principle is the same, but you will need to hold and pull the belt around the motor pulley while threading the belt and turning the tub-drive pulley. The belt will become very tight, so be careful not to get pinched by it. Keep turning and adjusting the belt until it is centered and secured.
- Use wire cutters to remove the cable tie; be careful not to cut the belt. Turn the tub-drive pulley to ensure it is on correctly.
- Lower the O-ring to remove the belt install tool from the drive shaft. Turn the tub-drive pulley to ensure it is centered and on correctly attached around the tub-drive pulley and motor pulley.
- With the belt installed, you can now reattach either the front or rear panel and reconnect the power to the washing machine.

Apr. 09, 2024
How to Reset a Whirlpool Refrigerator Ice Maker

Apr. 09, 2024
6 Reasons Your LG Refrigerator Is Not Making Ice

Apr. 09, 2024
Kenmore Fridge Ice Maker Not Working? 5 Ways to Fix It

Mar. 06, 2024
How to Remove Fish Smell from Your Refrigerator

Mar. 06, 2024
How To Fix Bosch Dishwasher E24 Error

Mar. 06, 2024
Troubleshooting a Whirlpool Dishwasher Not Draining

Feb. 05, 2024
Why Is Your Fridge Water Not Working, but Ice Is?

Feb. 05, 2024
How to Fix the E15 Bosch Dishwasher Error Code

Feb. 05, 2024
How Much Power Does a Microwave Use?

Jan. 03, 2024
How to Properly Clean Refrigerator Coils

Jan. 03, 2024
How to Fix an LG Washer Showing OE Error Code

Jan. 03, 2024
Troubleshooting a GE Dishwasher with No Power and No Lights

Dec. 11, 2023
10 Reasons Why Your Bosch Dishwasher Won’t Start

Dec. 11, 2023
Troubleshooting the F5 Error Code with a Maytag Washer

Dec. 11, 2023
How To Fix a Kenmore Dryer That Isn’t Heating
(937) 252-3200Text or ring! ring!