

March 22, 2019
Washer Repair
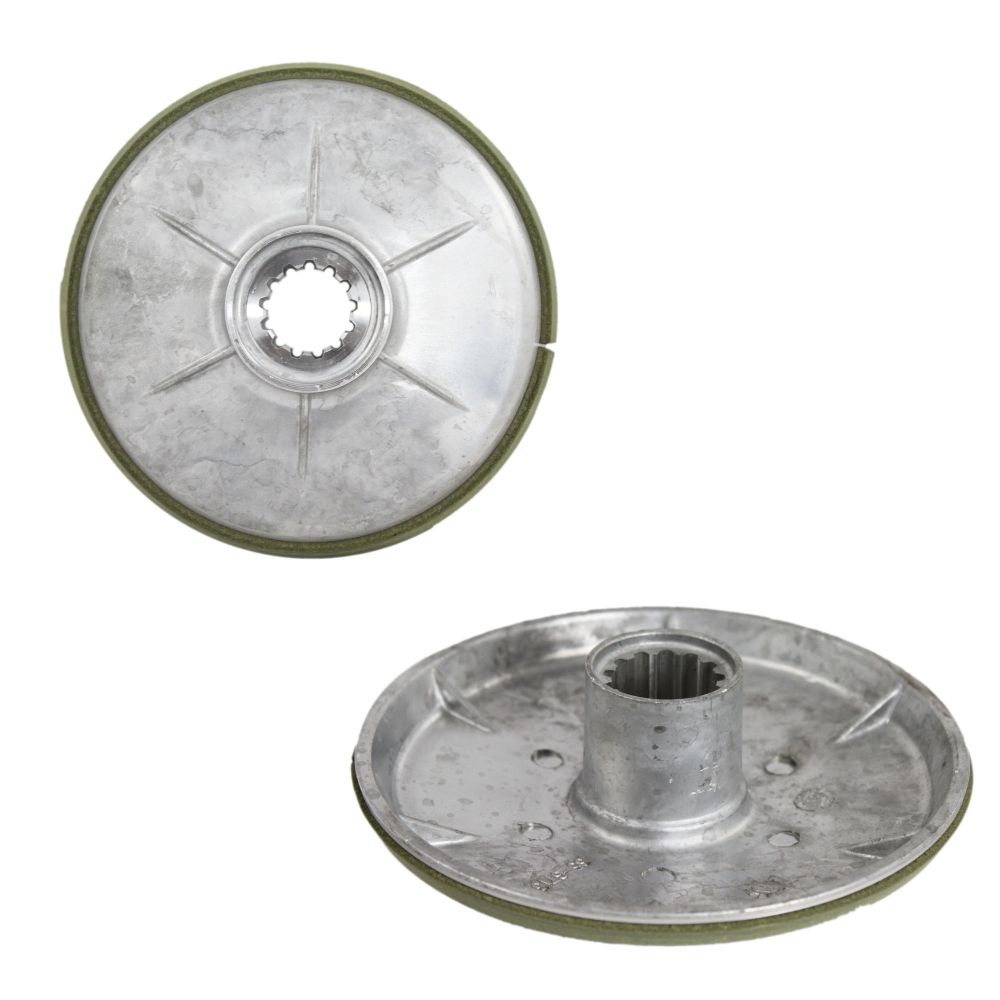
During your washer’s agitation cycle, the brake rotor is pushed against the brake stator to control agitation movement. But if you hear squeaking during the washer’s agitation cycle or while it’s stopping, the rotor and stator aren’t fitting together properly. You will have to replace the rotor or both parts. For most Maytag washer models, order replacement part #WP35-6714 for a new brake rotor. Then follow these steps to install it.
1. Unplug the washer and turn off the water supply lines.
Before you start repairing an appliance, always make sure the appliance is unplugged or its circuit breaker is flipped. During this repair, you will need to turn the machine onto its back. In order to do that safely, you will need to:
- First, turn off the hot and cold water supply lines at the wall.
- Then disconnect the lines from the ports at the back of the appliance. Also, disconnect the drain hose so it isn’t pinched during the repair.
2. Dismantle the washer exterior.
First, secure the door against the top panel with tape so it doesn’t open and close.
Next, remove the top panel by depressing the clips under the panel. Use a putty knife to depress the clip on both front corners and then lift up the panel. Carefully lean the panel against the wall so it doesn’t fall all the way back.
After that, remove the front access panel. To do this, remove the screws in the interior of the front top corners that secure the front panel to the frame. Lift the panel up off the bottom edge as you tilt it and then pull it free. Set it aside. Then slide a wooden or plastic block behind the tub. This will stop the tub from pressing up against the frame when you set the machine on its back at the end of this step. It also holds the tub closer to the center of the interior.
Lower the front panel without re-engaging the locking clips and hold it down. Then lower the washer onto its back.
3. Access and remove the old brake rotor.
To start, remove the belt stretched between the three pulleys at the bottom of the washer. Do this by grabbing the motor in the left corner of the washer’s body and pushing it to the right. This lowers the tension on the belt at the bottom of the washer (on the outside) so you can simply pull it away from the pulleys and set it aside. Consider wearing gloves before grabbing the motor to protect your hands.
Next, remove the transmission pulley assembly. The parts you will remove are:
- The transmission pulley’s dust cap
- The E-shaped lock clip below it
- The thrust washer
- The remainder of the pulley assembly, including the pulley itself
Below that is the stator. You can see the majority of the part, but it doesn’t fully align with the cut-out because it’s attached to the bottom of the washer tub. Before you remove the stator, you need to realign the tub inside the machine so the stator isn’t partially below the hole. Lift up the tub from the side and slide another wood block under the tub to lift it high enough.
Then remove every other screw around the exterior edge of the stator and replace with longer machine screws. Then remove the other screws. Loosen the new screws just a few turns at a time to slowly release pressure from the spring. Once the stator hangs loosely instead of being pushed forward, you can just remove the screws. Without this gradual release, the stator will be too pressurized and it can hurt you or the machine as spring forces it out of the machine.
Lift the stator up and pull it out. Pull out the rotor; the brake spring might come with it, so just set it back on the shaft.
4. Install the new rotor.
First, remove the bearing from the middle of the old rotor. This part doesn’t come with the new rotor. Apply oil around the edge of the bearing and then push it into the rotor.
Next, push the roto into the machine. Orient the spring with the cup deeper in the machine and slide the rotor over the shaft, bearing side out. Press it in until it stays in position. Then add the stator back over the rotor and secure it with the three longer screws in alternating holes. These longer screws contain the pressure from the brake spring. Make you tighten them alternatingly so everything stays level.
After that, add three of the original screws into the available holes. Remove the longer screws and add back int the remainder of the original holes. Now the stator is firmly secured. Remove the second wooden block you adding to reposition the stator.
5. Reassemble the transmission pulley assembly.
Start by reassembling the transmission pulley assembly.
First, slide the pulley, white cap side out, over the shaft. Press both parts in as far as they can go. Then add in the thrust washer. Add the E-shaped locking clip into the groove and then press it into position with pliers until it grabs onto the shaft. Finally, add the dust cap.
After that, attach the pulley. Slide the length of the belt over the pump pulley in the right corner and the motor pulley in the left corner. Pull the motor block to the right with your hand and then add the extra length around the bottom of the transmission pulley. Next, lift up the machine and set it back upright. Make sure you hold or secure the top panel as you move the appliance so the panel doesn’t swing. Once it’s upright, open the top panel and resecure it with a strap. Take out the first wooden block you slid behind the tub.
6. Reassemble the exterior.
Slide the bottom edge of the front access panel into the groove at the bottom of the body. Tilt the panel flush against the machine, pushing the panel down into place at the same time. Hold it in place as you secure it with the two screws you remove from the interior top corners.
Next, remove the strap holding up the top panel and slowly lower it. You should hear it click as it closes to indicate that the locking tabs have engaged. If it doesn’t click, press firmly down until the tabs lock. Reinstall the connection hoses from the hot and cold water supply lines. Make sure you install the ends into the correct ports. Also, reinstall the washer drain hose at whichever point you disconnected it.
Finally, turn on the hot and cold water supplies and plug the machine back in.
If you have more repairs that you want to make, contact our team for help at Authorized Service.

Apr. 09, 2024
How to Reset a Whirlpool Refrigerator Ice Maker

Apr. 09, 2024
6 Reasons Your LG Refrigerator Is Not Making Ice

Apr. 09, 2024
Kenmore Fridge Ice Maker Not Working? 5 Ways to Fix It

Mar. 06, 2024
How to Remove Fish Smell from Your Refrigerator

Mar. 06, 2024
How To Fix Bosch Dishwasher E24 Error

Mar. 06, 2024
Troubleshooting a Whirlpool Dishwasher Not Draining

Feb. 05, 2024
Why Is Your Fridge Water Not Working, but Ice Is?

Feb. 05, 2024
How to Fix the E15 Bosch Dishwasher Error Code

Feb. 05, 2024
How Much Power Does a Microwave Use?

Jan. 03, 2024
How to Properly Clean Refrigerator Coils

Jan. 03, 2024
How to Fix an LG Washer Showing OE Error Code

Jan. 03, 2024
Troubleshooting a GE Dishwasher with No Power and No Lights

Dec. 11, 2023
10 Reasons Why Your Bosch Dishwasher Won’t Start

Dec. 11, 2023
Troubleshooting the F5 Error Code with a Maytag Washer

Dec. 11, 2023
How To Fix a Kenmore Dryer That Isn’t Heating
(937) 252-3200Text or ring! ring!