

August 16, 2019
Washer Repair
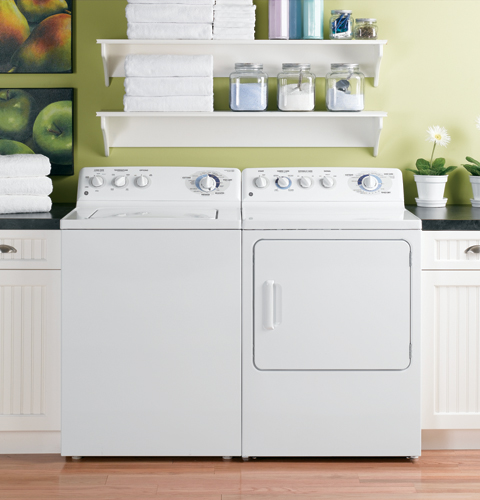
A vibrating GE washer model WJRR4170GWW isn’t an unusual sight, however, a washer that shakes excessively, or walks during operation is abnormal and likely indicates a component in your appliance is damaged. While the list of possible malfunctions isn’t short, a broken suspension rod and a cracked tub cover are two-component failures that commonly cause a shaky washer. If you would like to learn how to replace both parts, the repair guides below will help you.
Before you begin repairing your washer, unplug it from the wall and turn off its water supply. Protecting your hands and eyes by wearing work gloves and safety goggles is always recommended. If you feel as though you cannot safely repair your washer, please stop what you’re doing and contact an appliance repair specialist to complete the job.
The Suspension Rod
A top load washer has four suspension rods that run between the appliance’s base frame and its outer tub. During a spin cycle, the rods reduce the movement of the tub. If one of the suspension rods is broken, your washer will usually exhibit two symptoms. The first being excessive vibrations, and the second being loud banging during the spin cycle. Allowing the faulty rod to remain in place can cause damage to other components in your appliance.
How to Replace the Front Suspension Rod in Your Top Load GE Washer
- To release the front panel of your washer, near the right corner, insert a putty knife in-between the top and front panel. Then, slide the putty knife towards the center of the panels to disengage the first locking tab. Repeat the same process near the left corner of your washer’s top and front panels. Once both locking mechanisms are released, tilt the front panel towards you and lift it up and off your appliance.
- Now head to the back of your washer, and use a 1/4″ nut driver to unthread the screws securing the console to the washing machine. Then, lift the console up to release it from the washer’s top panel. You don’t need to completely uninstall the washer console, instead, let it rest on the rear mounting bracket while you uninstall the top panel.
- At this point, you can move to the front of your appliance and unthread the screws that hold the top panel to the washer. Once you’ve taken the screws out, pull the panel forward a few inches, and then lift the panel up until you have a clear view of the lid switch. Using a Flathead screwdriver, push the lid switch up and through the opening in the top panel. Then, turn the switch sideways to thread it back through the opening. Now that the lid switch is no longer attached to the top panel, you can lift the panel off your washer.
- With the top and front panel out of the way, you now have access to the broken suspension rod. To uninstall the rod, lift up on the washer tub, and then reach down to the bottom of the tub to release the plastic clip that secures the rod to the lower mounting bracket.
- Now that the bottom end of the suspension rod is free, you can uninstall the top half. To do so, use a Flathead screwdriver to release the locking tabs on the underside of the bushing. Once the tabs are disengaged, lift the bushing up and out of the top mounting bracket. Then, slide the bushing off the suspension rod. To finish uninstalling the rod, simply lower it through the opening on the mounting bracket.
- At this point, you can grab the new suspension rod and carry it over to your washer. To start installing it, insert the top half of the rod through the opening on the top mounting bracket. Then, slide the bushing onto the rod and push down on it to engage its locking mechanism. Once the bushing is secure, set the top half of the rod down so it rests on top of the bushing.
- Lift up the washer tub and guide the lower half of the suspension rod into the opening on the bottom mounting bracket. Then, pull up on the rod to snap it into the bracket.
- With the repair finished, it’s time to reassemble your washer. Start by replacing the top panel. Before securing the panel to your washing machine, reinstall the lid switch. To do so, open the washer lid and guide the switch through the small hole near the mouth of the washer. Once the switch is situated, replace the top panel screws. Next, grab the front panel and align the bottom of the panel with the tabs at the bottom of the washer. Then, push the panel towards the washer cabinet until it locks into place. To finish reassembling your washer, simply replace the console and secure it with the screws you took out earlier.
The Tub Cover
Your washer is equipped with dampening straps that run between the frame and the tub cover. If one or more of the strap mounting points on the cover cracks, the dampening straps will lose their ability to decrease the movement of the tub.
How to Replace the Tub Cover in Your GE Washer
- Head to the back of your washer and unthread the hot and cold water lines from the washer inlet valve
- In order to access the tub cover, you’ll need to take the top and front panels off your washer. For instructions on how to uninstall both panels, please refer to steps 1 thru 3 in the suspension rod replacement guide provided above.
- Your next step is taking apart the console assembly. To do so, turn the console over and disconnect the air pressure hose. Then, unthread the screws that hold the console mounting bracket to your washer. Next, carefully pull the end-caps off the bracket. At this point, you can hang the console and its mounting bracket over the side of your washer.
- Now use a 5/16″ nut driver to unthread the screws securing the dampening straps to the mounting points on the tub cover. Once all the screws are out, pull the straps off their mounting points. Next, work your way around the tub cover to disengage the locking tabs holding the cover and the outer tub together, and then lift the tub cover off the outer tub.
- Grab your new tub cover and start installing it by lining up the tabs on the cover with the tabs on the outer tub. Then, push down on the cover to engage the locking tabs.
- With the cover in place, you can reinstall the dampening straps to the tub cover mounting points.
- At this point, you can start reassembling your washer. First, you’ll want to put the console assembly back together. To do so, line up the mounting bracket screw holes with the screw holes on the washer frame. Then, reattach the washer end-caps to the bracket. Next, secure the mounting bracket to the washer with the screws you took out earlier. Finally, reconnect the air pressure hose to the water level switch on the back of the console. Now carefully rest the front of the console on its mounting bracket.
- Close-up your washer by reinstalling the top and front panel. For more in-depth instructions, check out step 8 in the suspension rod replacement guide. Once both panels are on, you can finish replacing the front of the washer console by simply snapping it in place. Then, head to the back of your appliance and replace the console screws. To complete your repair reattach the hot and cold water lines to the washer’s inlet valve.
If your washer is shaking excessively, and you’re sure the problem isn’t the tub cover or a broken suspension rod, please contact us today and we’ll be happy to help you repair your appliance.

Apr. 09, 2024
How to Reset a Whirlpool Refrigerator Ice Maker

Apr. 09, 2024
6 Reasons Your LG Refrigerator Is Not Making Ice

Apr. 09, 2024
Kenmore Fridge Ice Maker Not Working? 5 Ways to Fix It

Mar. 06, 2024
How to Remove Fish Smell from Your Refrigerator

Mar. 06, 2024
How To Fix Bosch Dishwasher E24 Error

Mar. 06, 2024
Troubleshooting a Whirlpool Dishwasher Not Draining

Feb. 05, 2024
Why Is Your Fridge Water Not Working, but Ice Is?

Feb. 05, 2024
How to Fix the E15 Bosch Dishwasher Error Code

Feb. 05, 2024
How Much Power Does a Microwave Use?

Jan. 03, 2024
How to Properly Clean Refrigerator Coils

Jan. 03, 2024
How to Fix an LG Washer Showing OE Error Code

Jan. 03, 2024
Troubleshooting a GE Dishwasher with No Power and No Lights

Dec. 11, 2023
10 Reasons Why Your Bosch Dishwasher Won’t Start

Dec. 11, 2023
Troubleshooting the F5 Error Code with a Maytag Washer

Dec. 11, 2023
How To Fix a Kenmore Dryer That Isn’t Heating
(937) 252-3200Text or ring! ring!